
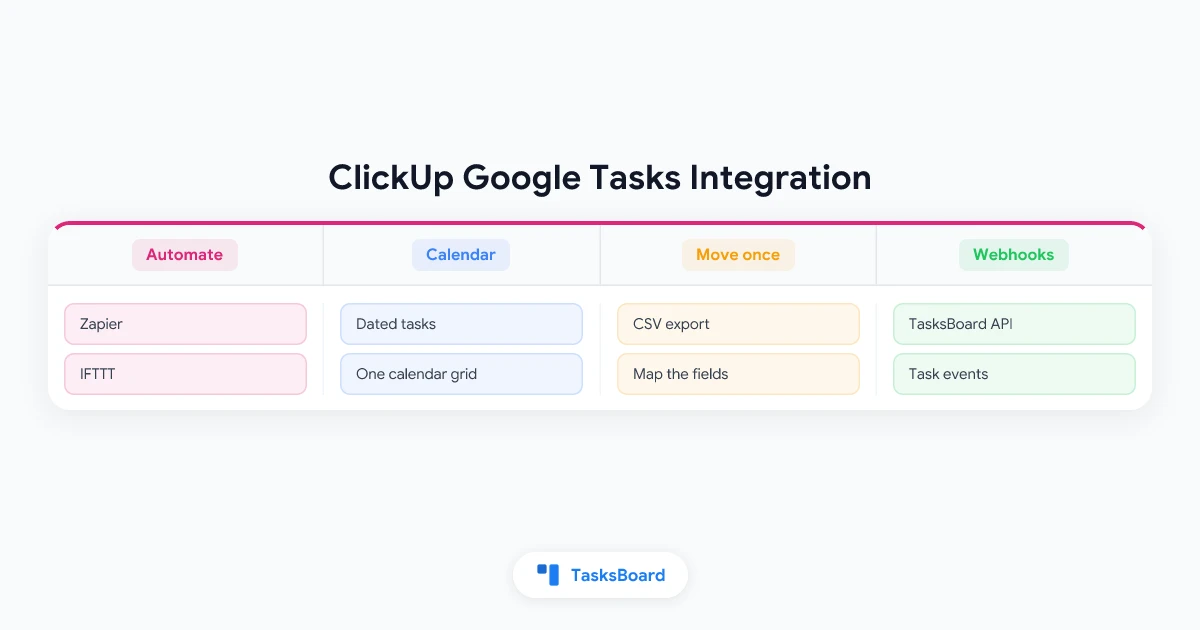
There is no built-in ClickUp Google Tasks integration. ClickUp connects to Google Calendar, Google Drive and Google Chat, but it has no connection to the lists in your Google Tasks account.
ClickUp’s own help page settles it in one line: “Google Calendar tasks will not sync to ClickUp.” That leaves four working routes, and each one solves a different problem.
Quick answer:
- ClickUp has no native link to Google Tasks. Its Google Calendar integration sends dated ClickUp tasks to a calendar and does not bring Google Tasks into ClickUp.
- For an ongoing link, use an automation tool such as Zapier or IFTTT. New Google Tasks are picked up every 1 to 60 minutes, depending on the tool and the plan.
- For a one-time move, export a CSV file on one side and import it on the other.
- Only the title, the notes, the date and the done state survive the trip. Google Tasks has no field for priority, tags or a time of day.
Does ClickUp Integrate with Google Tasks?
Not directly. ClickUp’s help center documents a Google Calendar integration, and that page rules Google Tasks out twice:
- “Google Calendar tasks will not sync to ClickUp.”
- “Events created in Google Calendar do not create a new task in ClickUp.”
So the tasks you see on your Google Calendar grid stay invisible to ClickUp, even with the calendar connected. Everything that does link the two apps is a third-party connector or a file.
 Four ways to connect ClickUp and Google Tasks
What Carries Over Between a ClickUp Task and a Google Task
Before you pick a route, check what can cross at all. The limit sits on the Google side, and no connector can lift it.
Google’s Tasks API reference describes a task as a title, notes, a date and a status that is either needsAction or completed. About the date, it says that “only date information is recorded” and that the time portion is discarded.
A ClickUp task carries far more. ClickUp’s list of fields supported by its importer includes a status, a priority from Urgent to Low, assignees, start and due dates with a time, tags, checklists and time estimates.
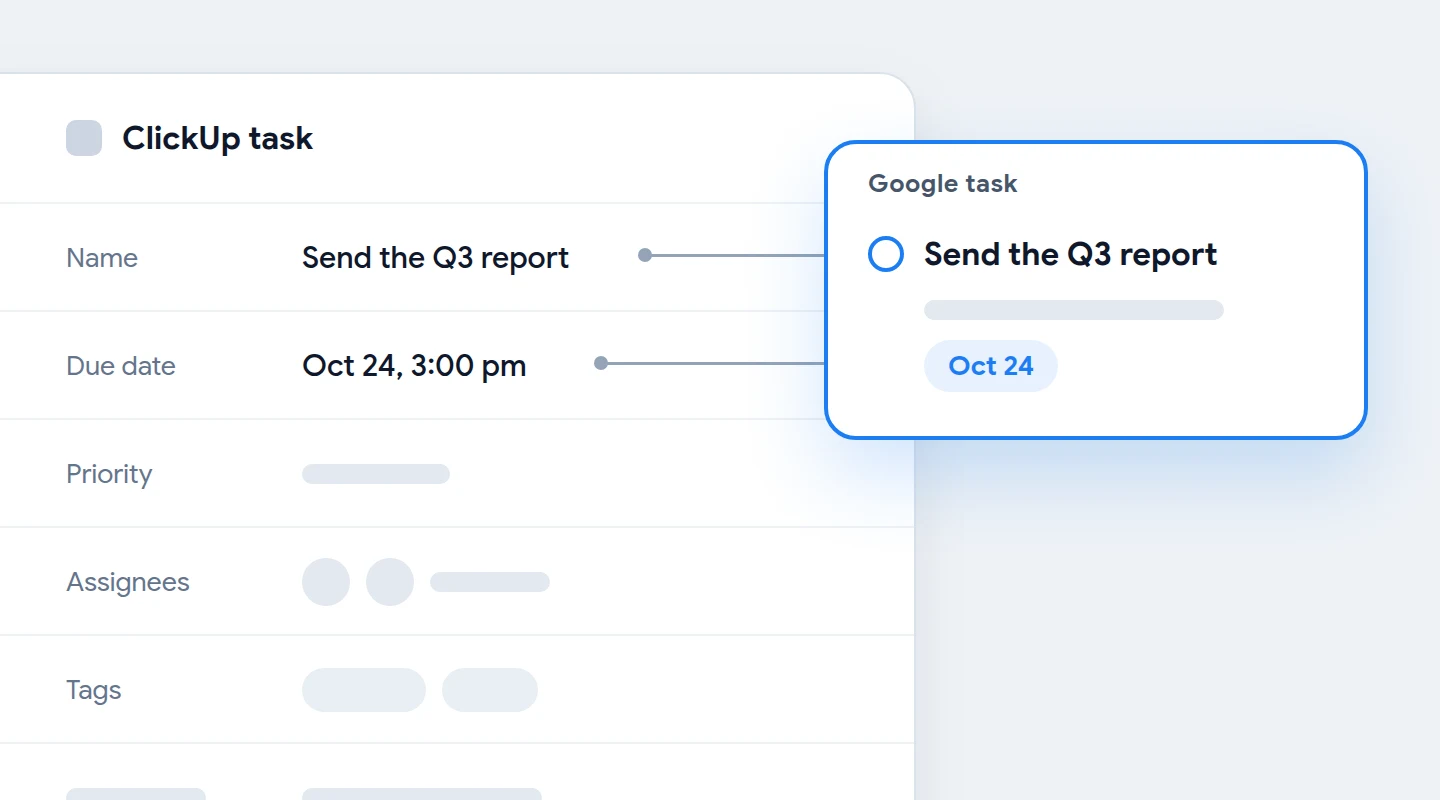
- Crosses cleanly: the task name, the description as notes, the due date as a day, and done or not done.
- Gets flattened: a due time becomes a date, and every ClickUp status becomes open or completed.
- Stays behind: priority, assignees, tags, checklists and time estimates, unless you paste them into the notes as text.
Way 1: Connect ClickUp and Google Tasks with Zapier or IFTTT
An automation tool is the closest thing to a live Google Tasks ClickUp integration. Zapier’s ClickUp and Google Tasks page lists the building blocks on each side:
- Google Tasks triggers: New Task, New Completed Task and New Task List.
- Google Tasks actions: Create Task, Update Task and Create Task List.
- ClickUp triggers: ten of them, including New Task and Task Changes.
- ClickUp actions: nineteen, including Create Task, Update Task and Create Subtask.
Notice what is missing on the Google side: there is no trigger for an edited or a deleted task. A Google task that you rename or reschedule never reaches ClickUp through this route.
Set up the two Zaps most people need
- Create a Zap from ClickUp to Google Tasks. Trigger: New Task in ClickUp. Action: Create Task in Google Tasks, with the name, the description and the due date mapped.
- Create the return Zap. Trigger: New Task in Google Tasks. Action: Create Task in ClickUp.
- Test each Zap with one task. Check the due date on the other side before you switch the Zap on.
- Add completion only if you need it. The Zap must first find the matching task on the other side, which takes a search step and so a multi-step Zap.
How long a task takes to cross
Google’s API reference lists eight methods for tasks, and none of them pushes changes out, so a connector has to ask on a schedule. Zapier’s Google Tasks page marks all three triggers as Polling.
Zapier’s help center gives the schedule: every 15 minutes on Free, every 2 minutes on Professional, and every minute on Team and Enterprise. IFTTT’s ClickUp and Google Tasks page offers 13 ready-made applets, with checks every hour on Free, every 15 minutes on Starter and every 5 minutes on Pro and Pro+.
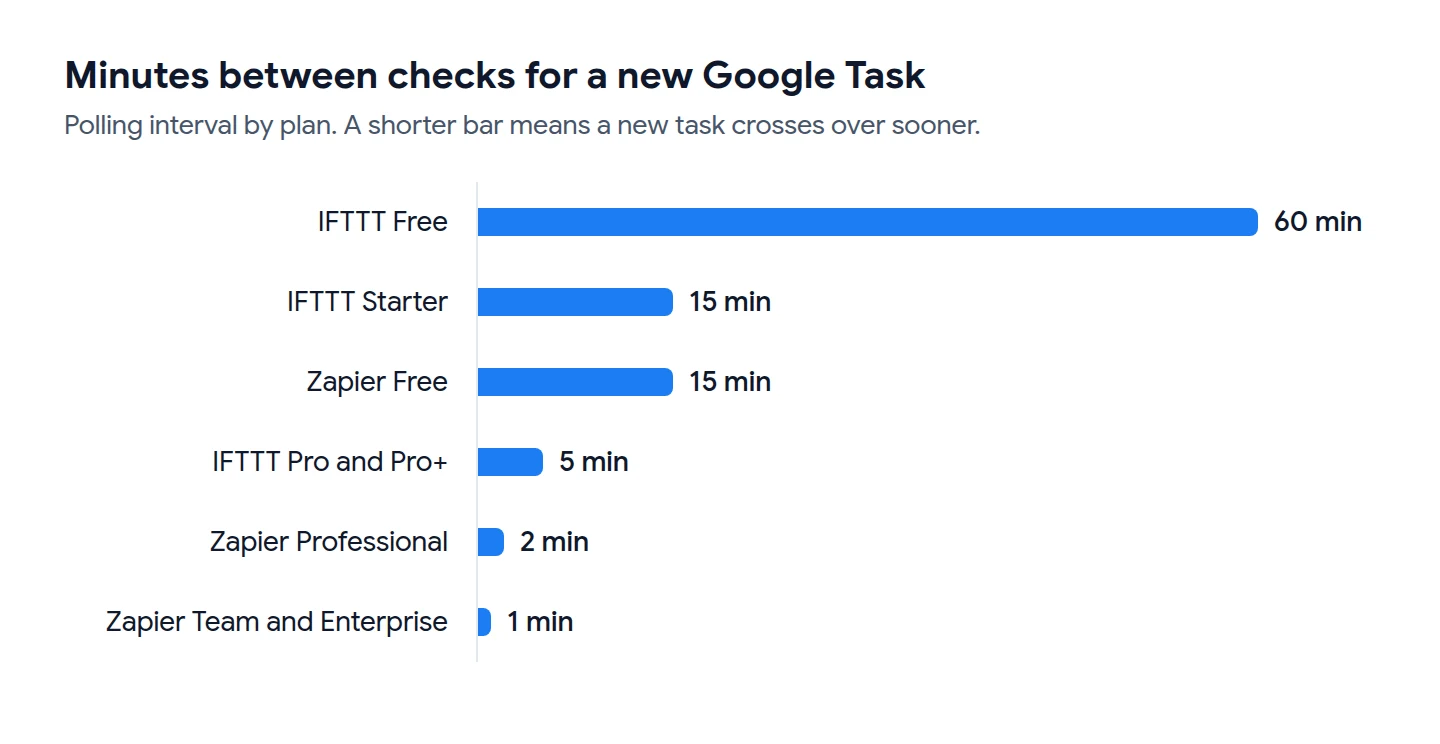
The other direction is faster on Zapier. Its ClickUp app page marks ClickUp’s triggers as Instant, which the help center describes as data sent as each event occurs.
What it costs to start
- Zapier: Zapier’s pricing page lists a Free plan with 100 tasks a month and two-step Zaps. Multi-step Zaps and webhooks start on Professional.
- ClickUp: ClickUp’s pricing page shows a Free Forever plan with unlimited tasks, and lists Zapier as included on every plan.
Way 2: Use the ClickUp Google Calendar Integration
This route does not sync the two task lists. It puts ClickUp tasks on the calendar where your dated Google Tasks already appear, which is often all one person needs.
ClickUp’s help page says the integration is available on every ClickUp plan and supports personal connections only. Setting up the task sync takes five steps:
- Open the App Center in ClickUp and choose Google Calendar.
- Click Manage to the right of Sync tasks to calendar.
- Click Add sync.
- Select a source, a destination and filters. The source is a Space, Folder, Subfolder or List.
- Click Add sync again to confirm.
| Syncs to Google Calendar | Does not sync |
|---|---|
| Tasks with a start date or a due date | Tasks with no due date, or a due date in the past |
| A new name, date or time on a synced task | Tasks that start more than 60 days ahead |
| Every task in the location, or only yours | Tasks in Closed statuses |
| The current instance of a recurring task | Future instances of a recurring task |
Three details from the same page save trouble later:
- Use a separate calendar. Tasks are created as busy events, so ClickUp recommends a brand new Google Calendar for the sync.
- Expect a delay. Task updates can take several minutes to show in Google Calendar.
- Edit in ClickUp. Changing the event in Google Calendar does not update the related task.
Way 3: Move Tasks Once with a CSV File
If you are switching tools rather than running both, skip the sync and move the data once.
From Google Tasks to ClickUp
Google Tasks has no CSV button of its own, so start with one of the ways to export Google Tasks. The shortest one runs through TasksBoard, where the help page on exporting a list describes a Download CSV item that works on every plan.
- Download the list. In TasksBoard, open the three dots menu next to the list name and click Download CSV. The file has the columns Title, Notes, Due, Status, Completed date, Labels, Assignees and Parent task.
- Open the importer in ClickUp. ClickUp’s importer guide gives the path: your Workspace avatar, Settings, Imports / Exports, then Spreadsheet.
- Pick the destination. Choose a Space, Folder or List, set the date format to Year-Month-Day, and click Continue.
- Upload the file and map the fields. Match Title to Task Name, Notes to Description content, Due to Due date and Labels to Tags.
- Review the result. ClickUp keeps a report of each run in the import history.
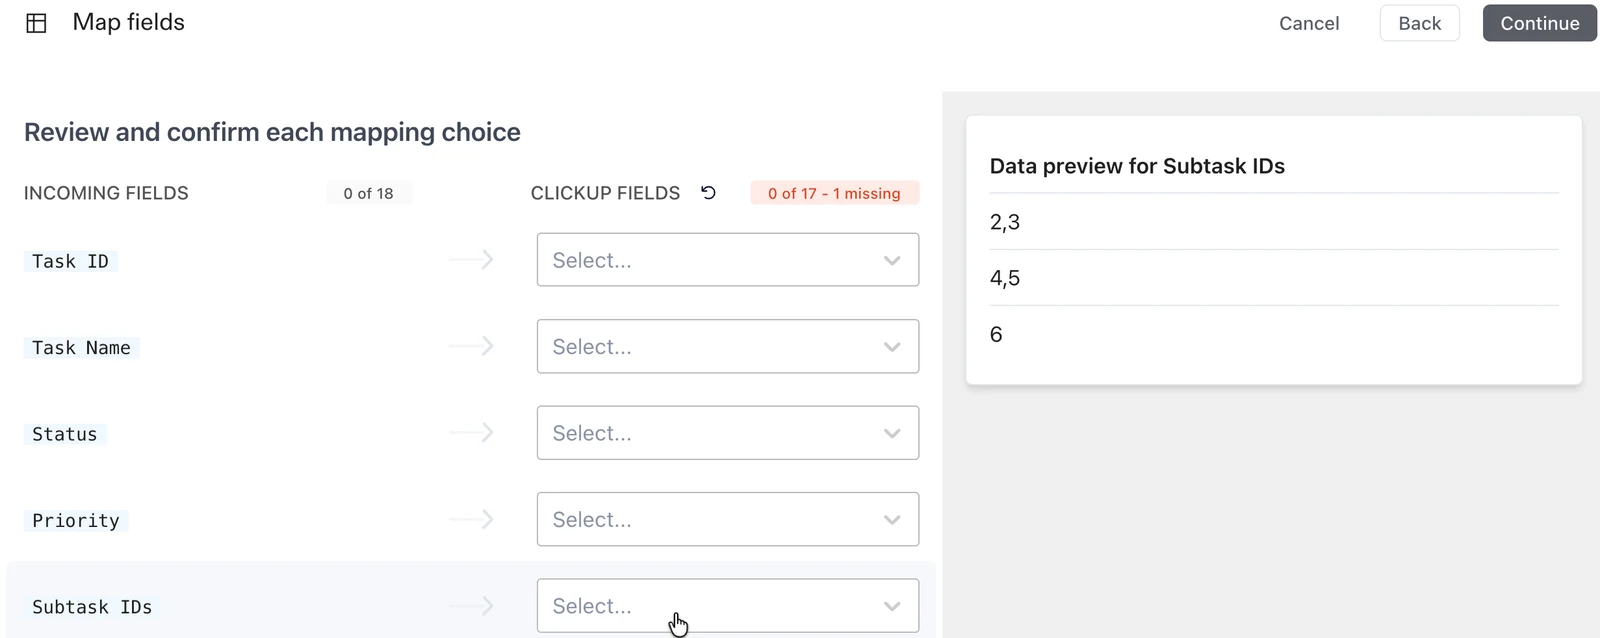
Two notes from ClickUp’s pages help here. Task Name is the only required column, and a Google Sheet has to be saved as a supported file such as CSV or Excel before it can be imported.
From ClickUp to Google Tasks
- Export the view. ClickUp’s export guide says to open a List or Table view, click Customize, then Export, and pick CSV as the file format.
- Choose the ISO date format. It writes the year, month and day first, which TasksBoard reads without guessing.
- Decide about subtasks. They are left out unless you set the Subtasks option of the List view to As separate tasks.
- Import the file. In TasksBoard, open the three dots menu next to the board name, click Import tasks and drop the file.
- Check the Columns panel, then click Import. The new lists appear on the board right away and sync to Google Tasks in the background.
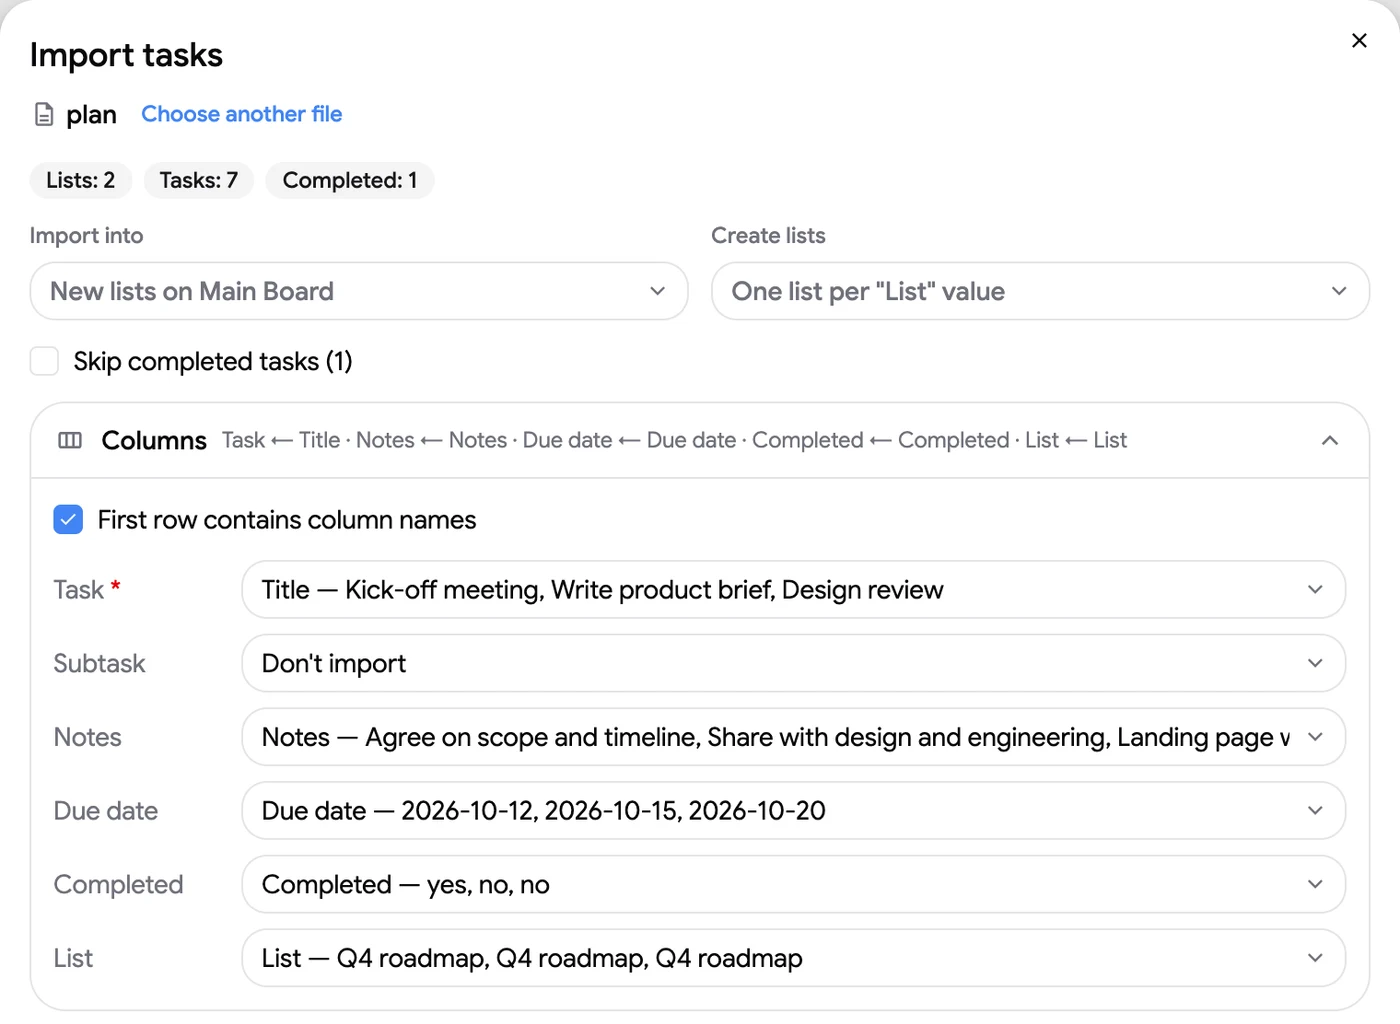
The help page on importing tasks adds the limits: one run takes up to 2,000 tasks and 100 lists. Loading the file and checking the preview is free, while running the import is a Premium feature.
Way 4: Push Google Tasks Changes with TasksBoard Webhooks
The automation route has one blind spot: edits and deletions made on the Google side. TasksBoard closes it for teams, because its Team plan includes a REST API and webhooks over the same Google Tasks data.
The API reference lists four events: task.created, task.updated, task.completed and task.deleted. Each delivery is a signed request to an https address you choose, with at most 10 webhooks per account.
- Create an API key on the Team page of TasksBoard.
- Register a webhook for the events you want, and point it at a webhook step in your automation tool.
- Add a ClickUp action after that step, such as Create Task or Update Task.
Where the events come from matters. Changes on shared lists are sent as they propagate, while lists that are not shared are checked every 15 minutes once you turn polling on.
On Zapier, a webhook step needs the Professional plan. Our walkthrough of the Google Tasks API and webhooks shows the calls and the signature check.
ClickUp vs Google Tasks: Do You Need Both?
Many people who search for this integration are really asking which tool is better, Google Tasks or ClickUp. The answer depends on how much structure the work needs.
Three cases cover most readers:
- Projects in ClickUp, personal to-dos in Google Tasks. Way 1 or Way 2 is enough, and the calendar sync is the lighter of the two.
- Leaving one tool for the other. Use the CSV move in Way 3 and stop there.
- You wanted ClickUp mostly for the board. A Google Tasks kanban board gives you that view with no second tool to keep in sync.
 Try TasksBoard
Turn your Google Tasks lists into a full screen kanban board, share a list and assign tasks to teammates. Free to start, and every task stays in Google Tasks, Gmail and Calendar.
Get Started →FAQ
Conclusion
A ClickUp Google Tasks integration does not come in the box, but four routes cover the real needs. Use an automation tool for an ongoing link, the calendar sync for one view of every date, a CSV file for a one-time move, and webhooks when edits and deletions must cross too.
Whichever you pick, remember the ceiling: a Google task holds a title, notes, a date and a done state. If what you wanted from ClickUp was a board, shared lists and assignees on top of the tasks you already have, TasksBoard adds them to Google Tasks directly, with nothing to sync.